Getting Started
This section guides you through:
- Dojo Unity SDK Setup: Learn how to integrate the Dojo.unity SDK into your Unity scene for seamless development.
- Calling Dojo Systems: Discover how to interact with various systems within your Dojo world directly from Unity.
- Building for Desktop & WebGL: Master the steps for building your onchain game for both desktop and WebGL platforms(using the Slot framework).
Setting up Unity Scene
Add Essential Prefabs
In your Unity project, navigate to the scene where you want to integrate the Dojo SDK.
- From the
Projectwindow, locate theAssets/Dojo/Prefabsfolder. Drag theWorldManagerprefab into your scene. This prefab acts as the central hub for managing entities in your Dojo world. - Additionally, navigate to the
Assets/Dojo/Runtimefolder and drag theUnityMainThreadDispatcherprefab into your scene.
Configuring the World Manager
Here's how to tailor the World Manager's settings to your specific needs:
Default Configuration
The World Manager operates with a default configuration called WorldManagerDataLocalConfig, residing in Dojo/Runtime/Config.
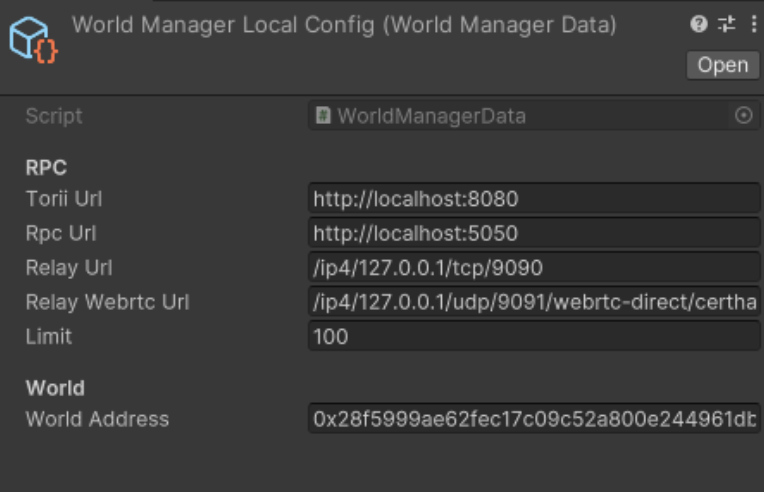 Feel free to modify this configuration directly if it suits your project's requirements.
Creating Custom Configurations
To create separate configuration files for different environments (like Slot), follow these simple steps:
In the Project window, right-click and choose Create > ScriptableObjects > WorldManagerData.
Customize the configuration values within this new ScriptableObject instance.
Applying a Configuration
To use a specific configuration, locate the WorldManager game object in your scene.
Drag the desired ScriptableObject (either the default one or your custom configuration) onto the DojoConfig field within the WorldManager component.
Adding Binding Models
-
Generate Models: If you haven't already created your model bindings, please refer to the Bingen section for step-by-step instructions on how to do so.
-
Import Models: Locate the
bindings/unity/Modelsfolder within your Dojo project. Simply drag the desiredmodelfiles from this folder into your Unity project. TheSynchronization Masterwill automatically detect and load these models for seamless data exchange.

Calling systems
This section explores the process of interacting with Dojo systems from Unity, which involves these steps: Account creation, contract assembly, and execution.
Account Creation
We have two options for creating an account: a simple account or a burner account.
Simple Account Creation
To create a simple account, follow this code:
using Dojo;
using Dojo.Starknet;
using UnityEngine;
void Start()
{
var provider = new JsonRpcClient(dojoConfig.rpcUrl);
var signer = new SigningKey(masterPrivateKey);
var account = new Account(provider, signer, new FieldElement(masterAddress));
}Burner Account Creation
For a burner account, execute the following code:
using Dojo;
using Dojo.Starknet;
using UnityEngine;
async void Start()
{
Account burnerAccount = await CreateBurnerAccount(dojoConfig.rpcUrl, masterAddress, masterPrivateKey);
}
private async Task<Account> CreateBurnerAccount(string rpcUrl, string masterAddress, string masterPrivateKey )
{
var provider = new JsonRpcClient(rpcUrl);
var signer = new SigningKey(masterPrivateKey);
var account = new Account(provider, signer, new FieldElement(masterAddress));
BurnerManager burnerManager = new BurnerManager(provider, account);
return await burnerManager.DeployBurner();
}Replace
masterAddressandmasterPrivateKeywith the account Address and private key of the prefunded Katana account.

Contract assembly and execution
The Bingen plugin also generates bindings for contracts. Therefore, the first step is to move these bindings into your Unity project.
Let's consider a contract named PlayerSystem within our Dojo project:
#[starknet::interface]
trait IPlayerSystem<TContractState> {
fn create(
ref self: TContractState, player: ContractAddress, player_name: felt252, gender_id: u64
);
}The generated bindings would be as follows:
using System;
using System.Threading.Tasks;
using Dojo;
using Dojo.Starknet;
using UnityEngine;
using dojo_bindings;
public class Player_system : MonoBehaviour {
// The address of this contract
public string contractAddress;
// Call the `create` system with the specified Account and calldata
// Returns the transaction hash. Use `WaitForTransaction` to wait for the transaction to be confirmed.
public async Task<FieldElement> Create(Account account, FieldElement player, string player_name, ulong gender_id) {
return await account.ExecuteRaw(new dojo.Call[] {
new dojo.Call{
to = contractAddress,
selector = "create",
calldata = new dojo.FieldElement[] {
new FieldElement(player.Hex()).Inner(),
new FieldElement(player_name).Inner(),
new FieldElement(gender_id.ToString('X')).Inner()
}
}
});
}
}Let's break down the concepts:
public string contractAddress;: This indicates the contract address of thePlayer_system, obtained as output fromsozo migrate.new dojo.Call{ ... }: This section creates a new call, where theselectoris the name of the system to call, and thecalldatarepresents the parameters. It's crucial to note that strings, uints and ulongs must be converted into hexadecimal representation.account.ExecuteRaw(new dojo.Call[] { ... }): This method executes the call, whereaccountcan be either a simple account or a burner account.
It's possible to execute an array of calls simultaneously by passing multiple calls to this method. For example:
public async Task<FieldElement> ExecuteCalls(Account account, dojo.Call[] calls)
{
return await account.ExecuteRaw(calls);
}Building your Dojo Game
The final stage is building your onchain game for deployment. Dojo currently supports building for both desktop and WebGL platforms.
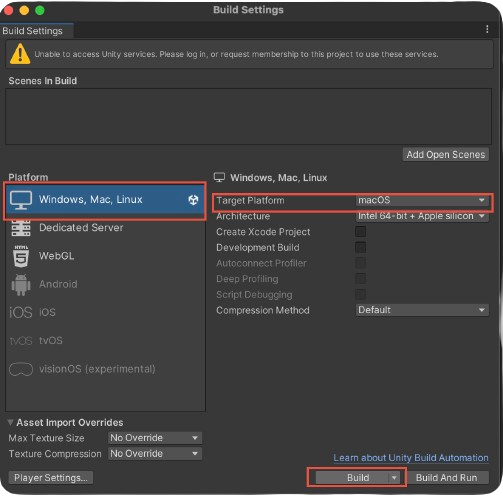
Building for Desktop (Windows, macOS, Linux)
- Navigate to
File/Build Settings. - From the right menu choose
Windows, Mac, Linuxoption. - From the Platform dropdown, select the target desktop platform (Windows, macOS, or Linux) based on your needs.
- Click the Build button to initiate the build process.
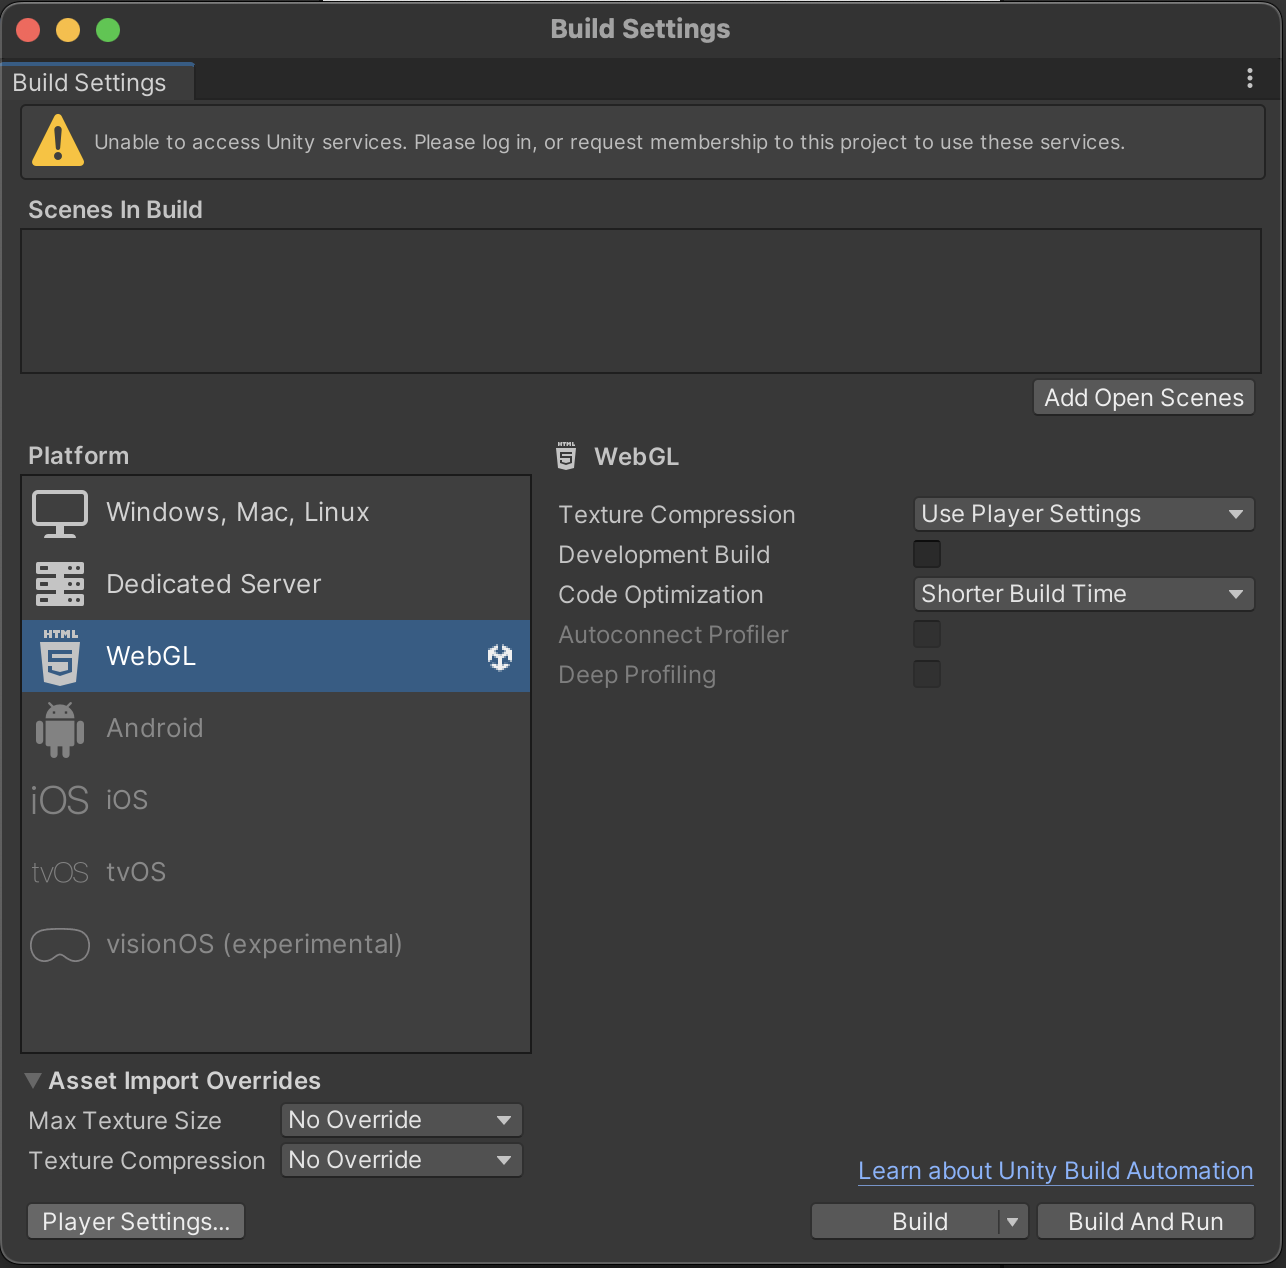
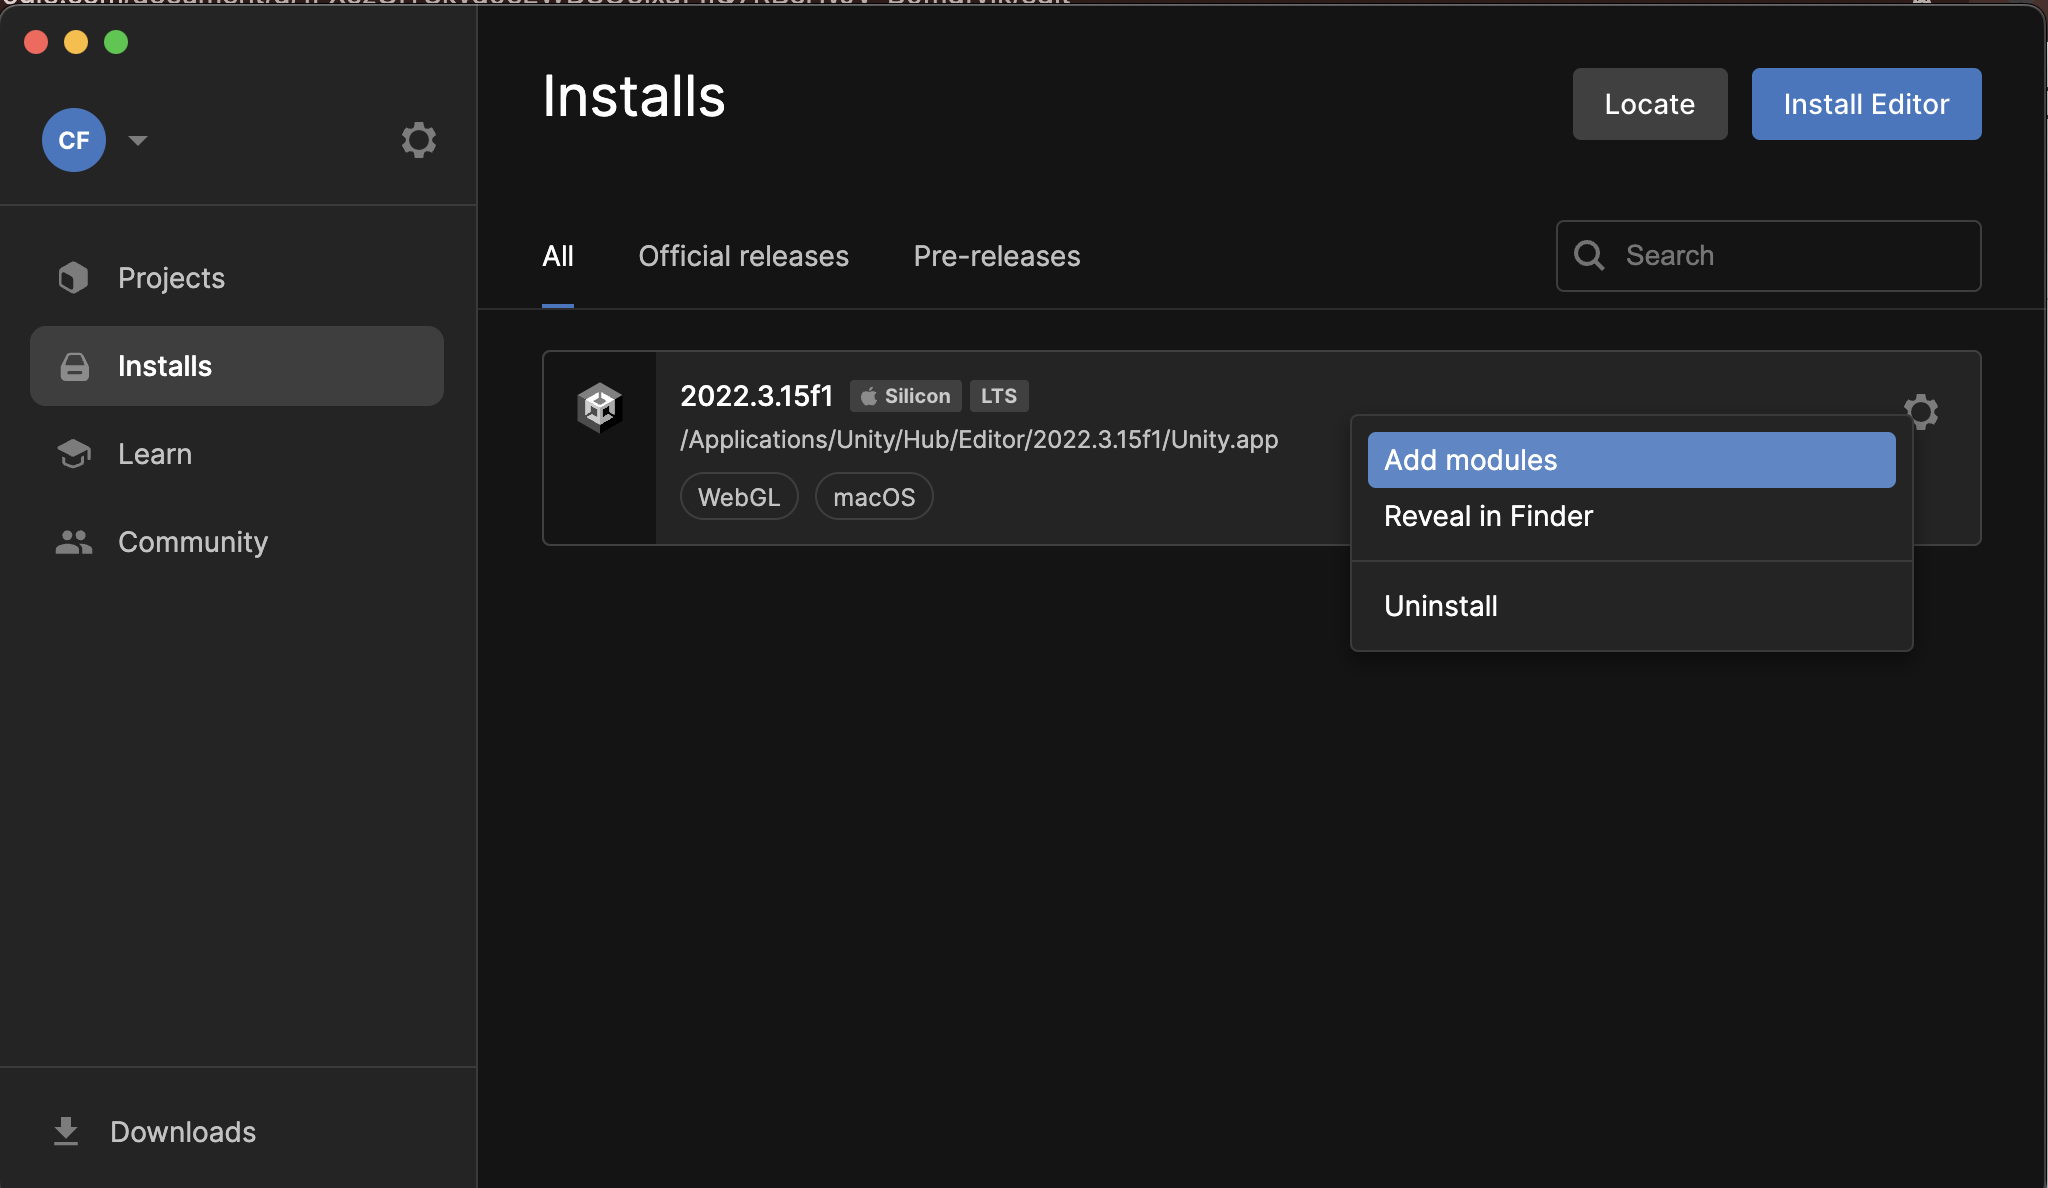
Building for WebGL
Ensure the WebGL module is installed for your current Unity version. If not:
- Open the
Unity Hub. - Go to
Installs. - Select the Unity version matching your project.
- Click
Add Modules. - Under the Modules tab, locate and install the
WebGLmodule.
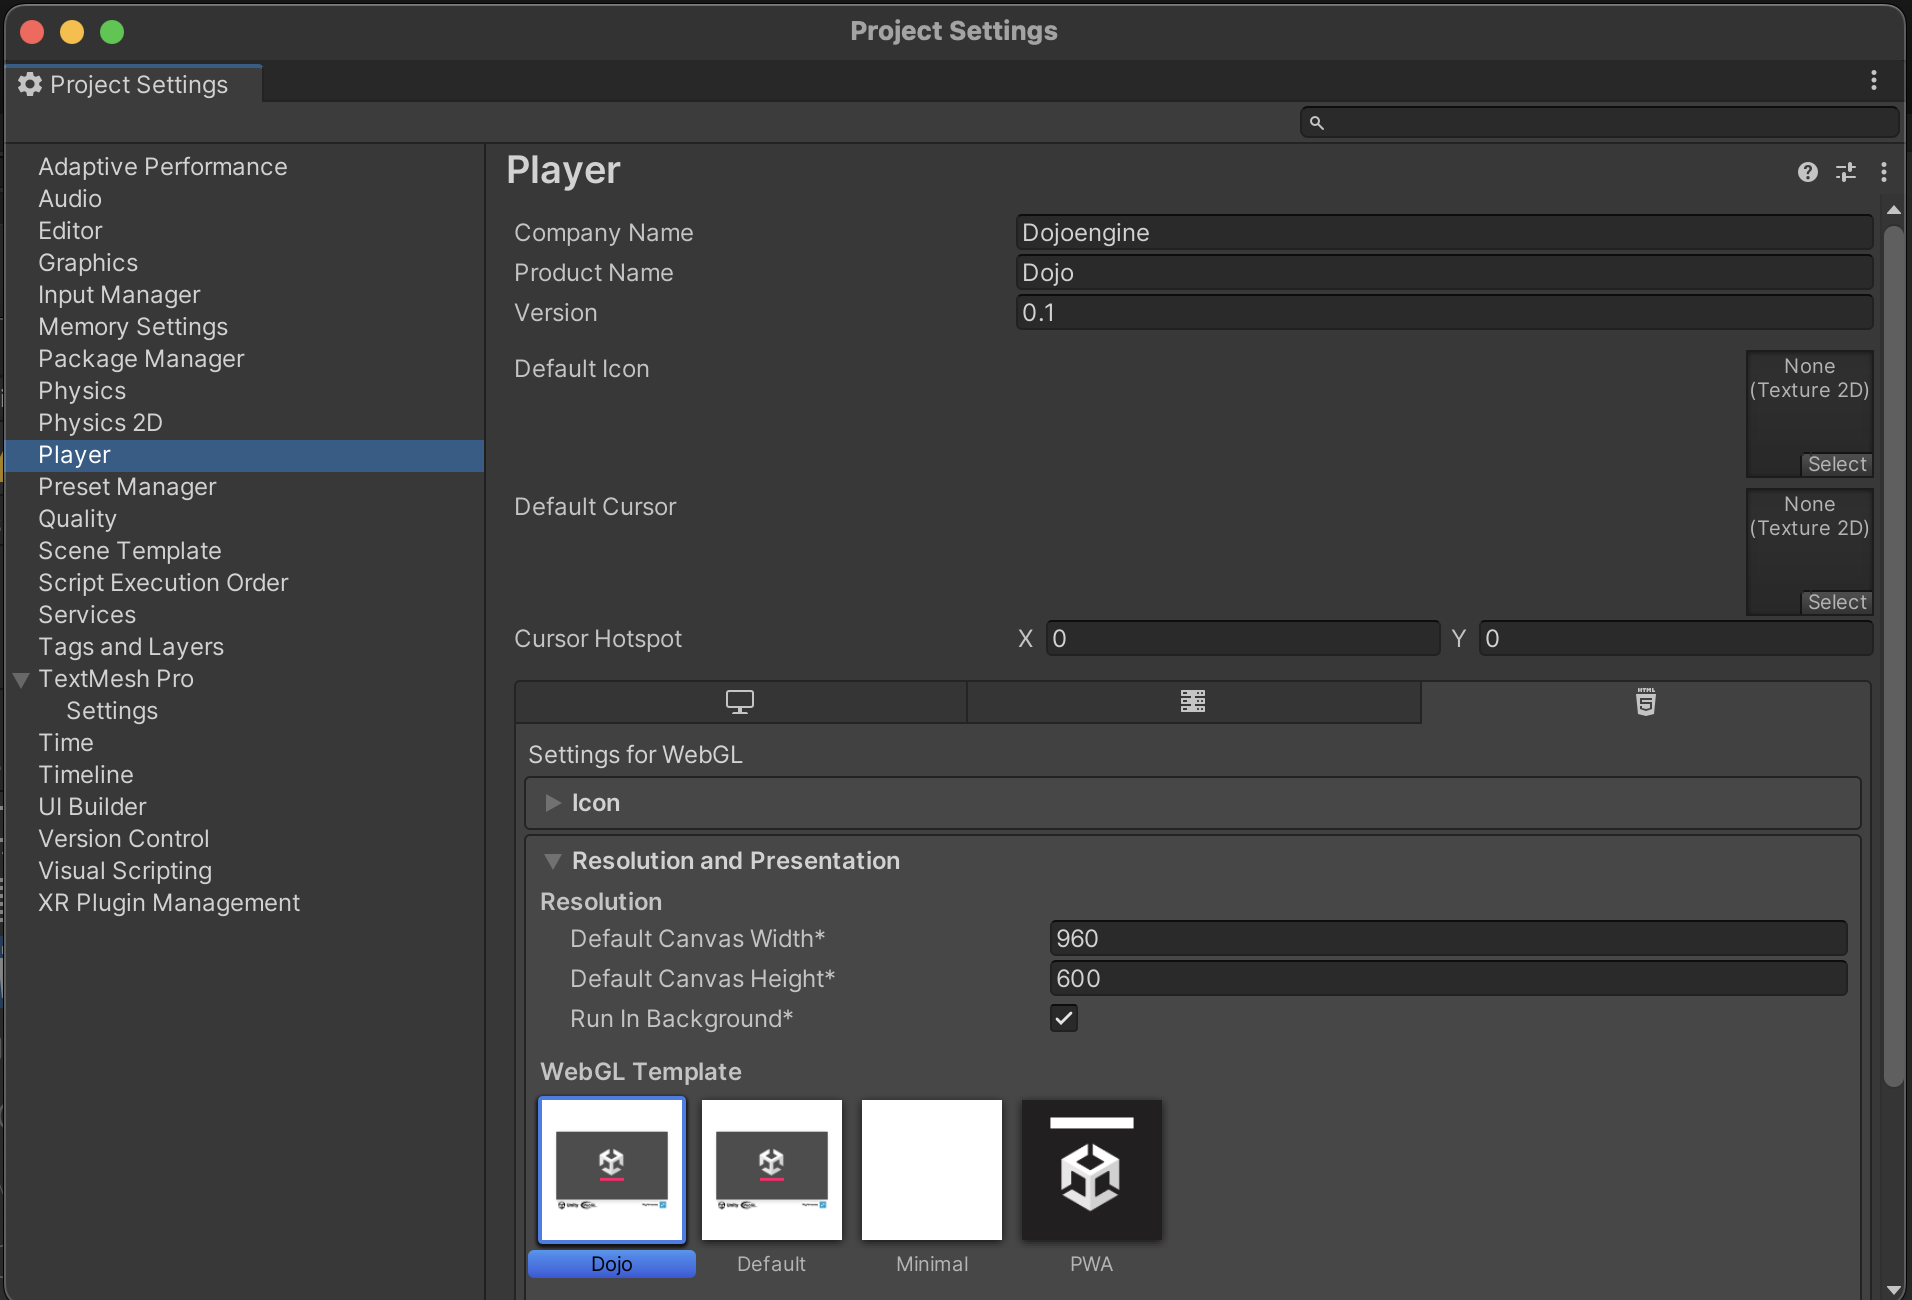
Configure WebGL Player Settings:
- Go to
Edit/Project Settings/Player(or navigate directly using the Project Settings window). - Select the
WebGLtab. - Under
Resolution and Presentation, ensure theDojo Templateis selected.
Build Steps:
- Navigate to
File/Build Settings. - From the right menu choose
WebGLoption. - Click the Build button to build your game for WebGL.