Dojo.unity
Unity is one of the world's most popular cross-platform game engines, powering millions of games across mobile, desktop, console, and web platforms. With its intuitive visual editor, robust scripting capabilities in C#, and extensive asset ecosystem, Unity enables developers to create everything from simple 2D indies to complex 3D AAA titles.
Dojo.unity is the official Unity Engine SDK for interacting with Dojo worlds to develop web and desktop 2D and 3D games. Whether you're creating a tactical RPG, a real-time strategy game, or an immersive 3D world, dojo.unity provides the tools you need to bring your onchain game vision to life.
Core Concepts
Before diving into the exciting world of onchain games and worlds with Unity, let's explore some essential concepts:
World Manager
The World Manager is the central hub for organizing and controlling entities within your Dojo world in Unity.

During initialization, the World Manager receives WorldManagerData, which defines essential settings like your Torii URL, RPC URL, and world address.
While these settings are initially provided, you have the flexibility to adjust them by creating different scriptable objects.
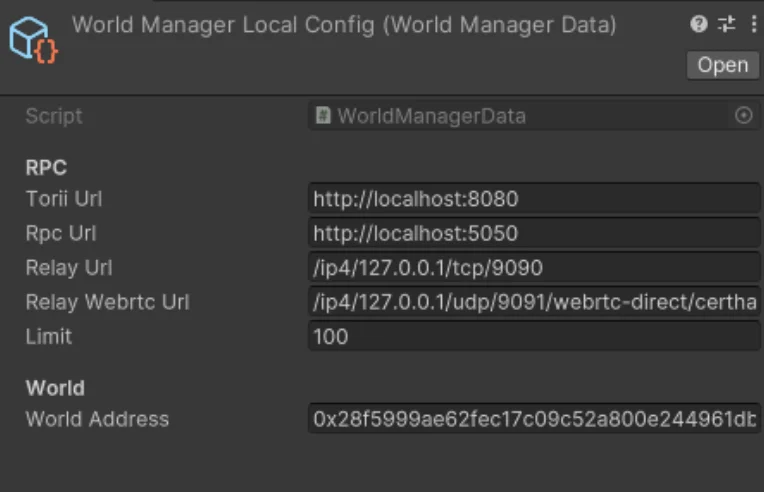
In Unity, entities are represented by GameObject instances.
The World Manager simplifies their management by offering methods to both add/remove entitites and access them collectively or by individual identifiers.
Synchronization Master
The Synchronization Master acts as the bridge between Unity and your Dojo world, seamlessly synchronizing and managing entities.
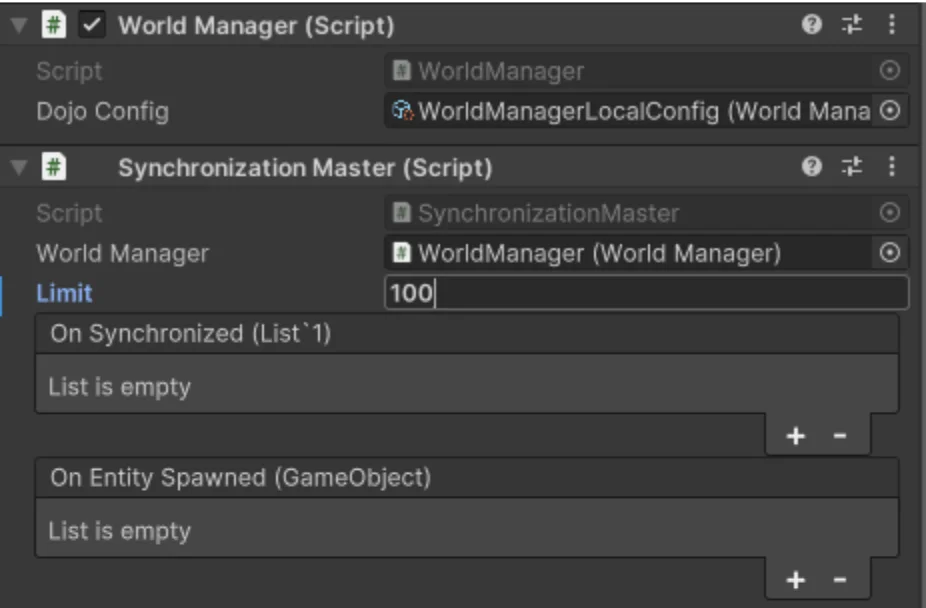
Key Features:
-
Control synchronization: Set the maximum number of entities to synchronize.
-
Event-driven communication:
OnSynchronized: Notifies you when entities were successfully synchronized from Dojo world to Unity.OnEntitySpawned: Triggered whenever a new entity is spawned in the Unity environment.
-
Dynamic entity management:
SynchronizeEntities: Asynchronously retrieves and spawns entities from the Dojo world in the Unity environment.HandleEntityUpdate: Dynamically updates existing entities or spawns new ones based on changes received from the Dojo world, ensuring seamless synchronization.
Code Bindings
In order to link your Dojo code, written in Cairo, with your Unity code, written in C#, we rely on something known as a "code binding". A code binding is an automatically-generated "stub" allowing code in one language to call functions implemented in another language.
Dojo's Sozo CLI provides built-in support for code bindings, through Cainome. You can learn more about Sozo's binding generation features here.
Getting Started
To get started with the dojo.unity SDK, follow these steps:
Prerequisites
Before getting started, ensure you have Unity >= 2022.3.15f1 installed.
Download dojo.unity
Visit the dojo.unity release page and download the latest version of dojo.unitypackage.
Open or create a Unity project
Launch Unity and either create a new project or open an existing one where you intend to integrate dojo.unity
Import dojo.unitypackage
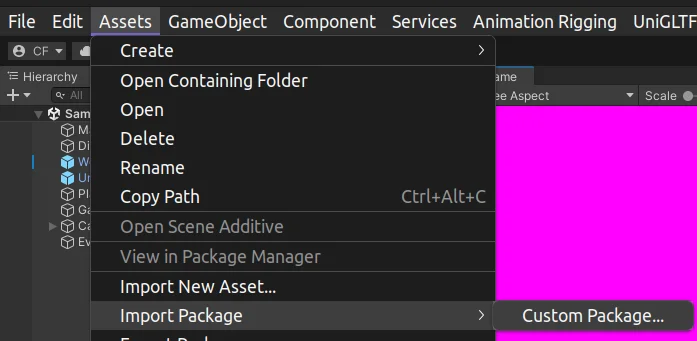
Navigate to Assets/Import Package/Custom Package within your Unity project.
Choose the downloaded dojo.unitypackage file.
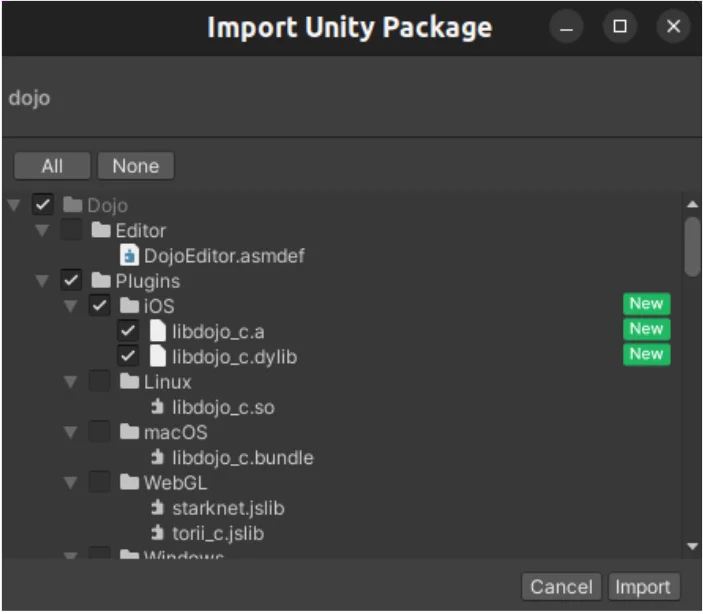
Finally, ensure to check only the intended platforms for your project.
Import Newtonsoft's Json.NET dependency
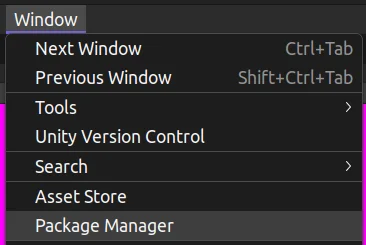
In Unity, navigate to Window/Package Manager.
Once the Package Manager window opens, select Add package from git URL
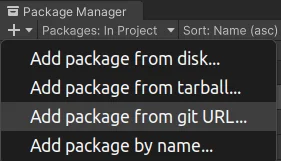
Enter com.unity.nuget.newtonsoft-json as the package URL, click Add and then Done to import the dependency.
Setting up a Unity scene
Add Essential Prefabs
In your Unity project, navigate to the scene where you want to integrate the SDK.
- From the
Projectwindow, locate theAssets/Dojo/Prefabsfolder. - Drag the
WorldManagerprefab into your scene. This prefab acts as the central hub for managing entities in your Dojo world. - Additionally, navigate to the
Assets/Dojo/Runtimefolder and drag theUnityMainThreadDispatcherprefab into your scene.
Configuring the WorldManager
The World Manager operates with a default configuration called WorldManagerDataLocalConfig, residing in Dojo/Runtime/Config.

Feel free to modify this configuration directly if it suits your project's requirements.
Creating Custom ConfigurationsTo create separate configuration files for different environments (like Slot), first navigate to the Project window, then right-click and choose Create > ScriptableObjects > WorldManagerData.
Customize the configuration values within this new ScriptableObject instance.
To use a specific configuration, locate the WorldManager game object in your scene.
Drag the desired ScriptableObject (either the default one or your custom configuration) onto the DojoConfig field within the WorldManager component.
Adding model bindings
-
Generate model bindings: If you haven't already created your model bindings, please refer to the bindgen section for instructions.
-
Import model bindings: Locate the
bindings/client/unity/Modelsfolder within your Dojo project, and drag the desiredmodelfiles from this folder into your Unity project. The Synchronization Master will automatically detect and load these models for seamless data exchange.

Calling Dojo Systems
This section explores the process of interacting with Dojo systems from Unity.
Account Creation
Every transaction to a Dojo system must come from an account. Accounts are required to sign and execute transactions that modify your game's on-chain state.
We have two options for creating an account: a simple account, or a burner account.
To create a simple account, use this code:
using Dojo;
using Dojo.Starknet;
using UnityEngine;
void Start()
{
var provider = new JsonRpcClient(dojoConfig.rpcUrl);
var signer = new SigningKey(masterPrivateKey);
var account = new Account(provider, signer, new FieldElement(masterAddress));
}For a burner account, use this code:
using Dojo;
using Dojo.Starknet;
using UnityEngine;
async void Start()
{
Account burnerAccount = await CreateBurnerAccount(dojoConfig.rpcUrl, masterAddress, masterPrivateKey);
}
private async Task<Account> CreateBurnerAccount(string rpcUrl, string masterAddress, string masterPrivateKey )
{
var provider = new JsonRpcClient(rpcUrl);
var signer = new SigningKey(masterPrivateKey);
var account = new Account(provider, signer, new FieldElement(masterAddress));
BurnerManager burnerManager = new BurnerManager(provider, account);
return await burnerManager.DeployBurner();
}System Execution
Once we have an account, we must execute a call to a Dojo system. To do this, we must first teach our Unity project about our Dojo contracts using code bindings.
Sozo's bindgen generates bindings for contracts, which must be transferred into your Unity project.
Let's consider a practical example: a PlayerActions contract that handles player creation in an RPG game.
This system allows players to create their character by choosing a name and selecting their gender, then stores this information on-chain as part of the game state.
#[starknet::interface]
pub trait IPlayerActions<T> {
fn create(
ref self: T, player_name: ByteArray, gender_id: u32
);
}
#[dojo::contract]
pub mod player_actions {
use super::IPlayerActions;
use starknet::{ContractAddress, get_caller_address};
use dojo::model::ModelStorage;
use dojo::world::{WorldStorage, WorldStorageTrait};
#[abi(embed_v0)]
impl PlayerActionsImpl of IPlayerActions<ContractState> {
fn create(ref self: ContractState, player_name: ByteArray, gender_id: u32) {
let mut world = self.world(@"namespace");
let player = get_caller_address();
// Create a new player model with the provided data
let player_data = Player {
player,
name: player_name,
gender: gender_id,
level: 1,
experience: 0
};
// Write the player data to the world state
world.write_model(@player_data);
}
}
}The generated bindings would be as follows:
using System;
using System.Threading.Tasks;
using Dojo;
using Dojo.Starknet;
using UnityEngine;
using dojo_bindings;
public class PlayerActions : MonoBehaviour {
// The address of this contract
public string contractAddress;
// Call the `create` system with the specified Account and calldata
// Returns the transaction hash. Use `WaitForTransaction` to wait for the transaction to be confirmed.
public async Task<FieldElement> Create(Account account, string player_name, uint gender_id) {
return await account.ExecuteRaw(new dojo.Call[] {
new dojo.Call{
to = contractAddress,
selector = "create",
calldata = new dojo.FieldElement[] {
new FieldElement(player_name).Inner(),
new FieldElement(gender_id.ToString()).Inner()
}
}
});
}
}Let's break down the concepts:
public string contractAddress;: The contract address of thePlayerActionssystem, obtained as output fromsozo migrate.new dojo.Call{ ... }: Creates a new call, where theselectoris the name of the system function ("create"), andcalldatacontains the serialized parameters (player name and gender ID).account.ExecuteRaw(new dojo.Call[] { ... }): Executes the transaction on-chain, creating the player character with the specified attributes. Theaccountcan be either a simple account or a burner account.
When this function is called from Unity (e.g., when a player fills out a character creation form), it will create a new on-chain player entity that persists in your Dojo world and can be queried by other systems or clients.
Building your Dojo Game
The final stage is building your onchain game for interaction and deployment. Dojo currently supports building for both desktop and WebGL platforms.
Building for Desktop
Follow these instructions to build your game for Windows, Mac, or Linux.
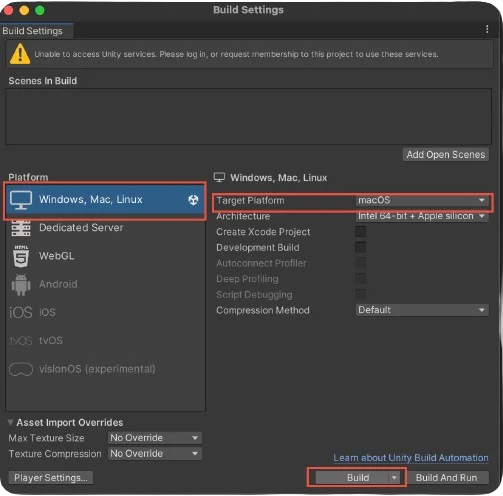
- Navigate to
File/Build Settings. - From the right menu choose the
Windows, Mac, Linuxoption. - From the Platform dropdown, select the target desktop platform.
- Click the Build button to initiate the build process.
Building for WebGL
Ensure the WebGL module is installed
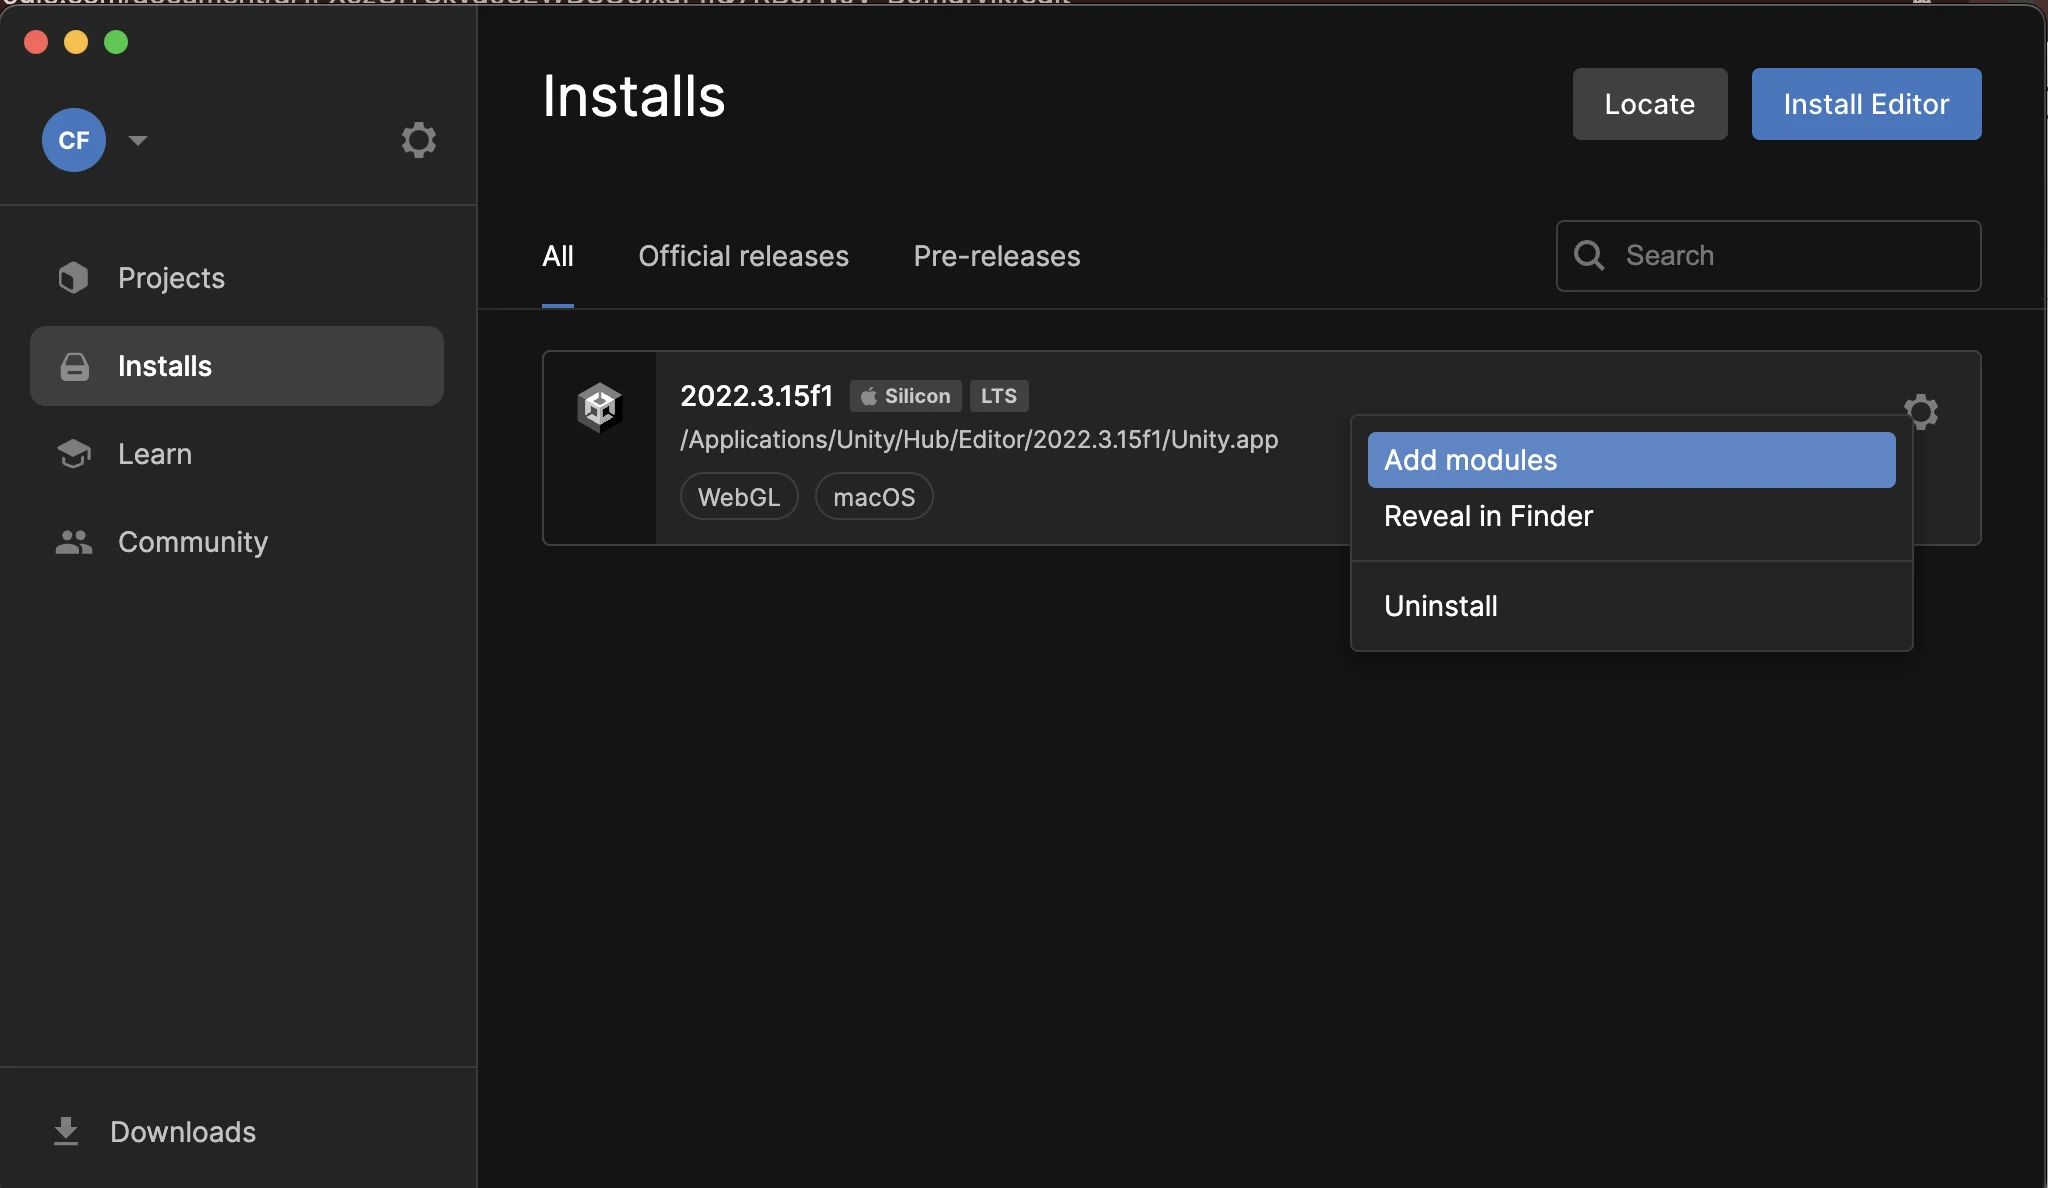
- Open the
Unity Hub. - Go to
Installs. - Select the Unity version matching your project.
- Click
Add Modules. - Under the Modules tab, locate and install the
WebGLmodule.
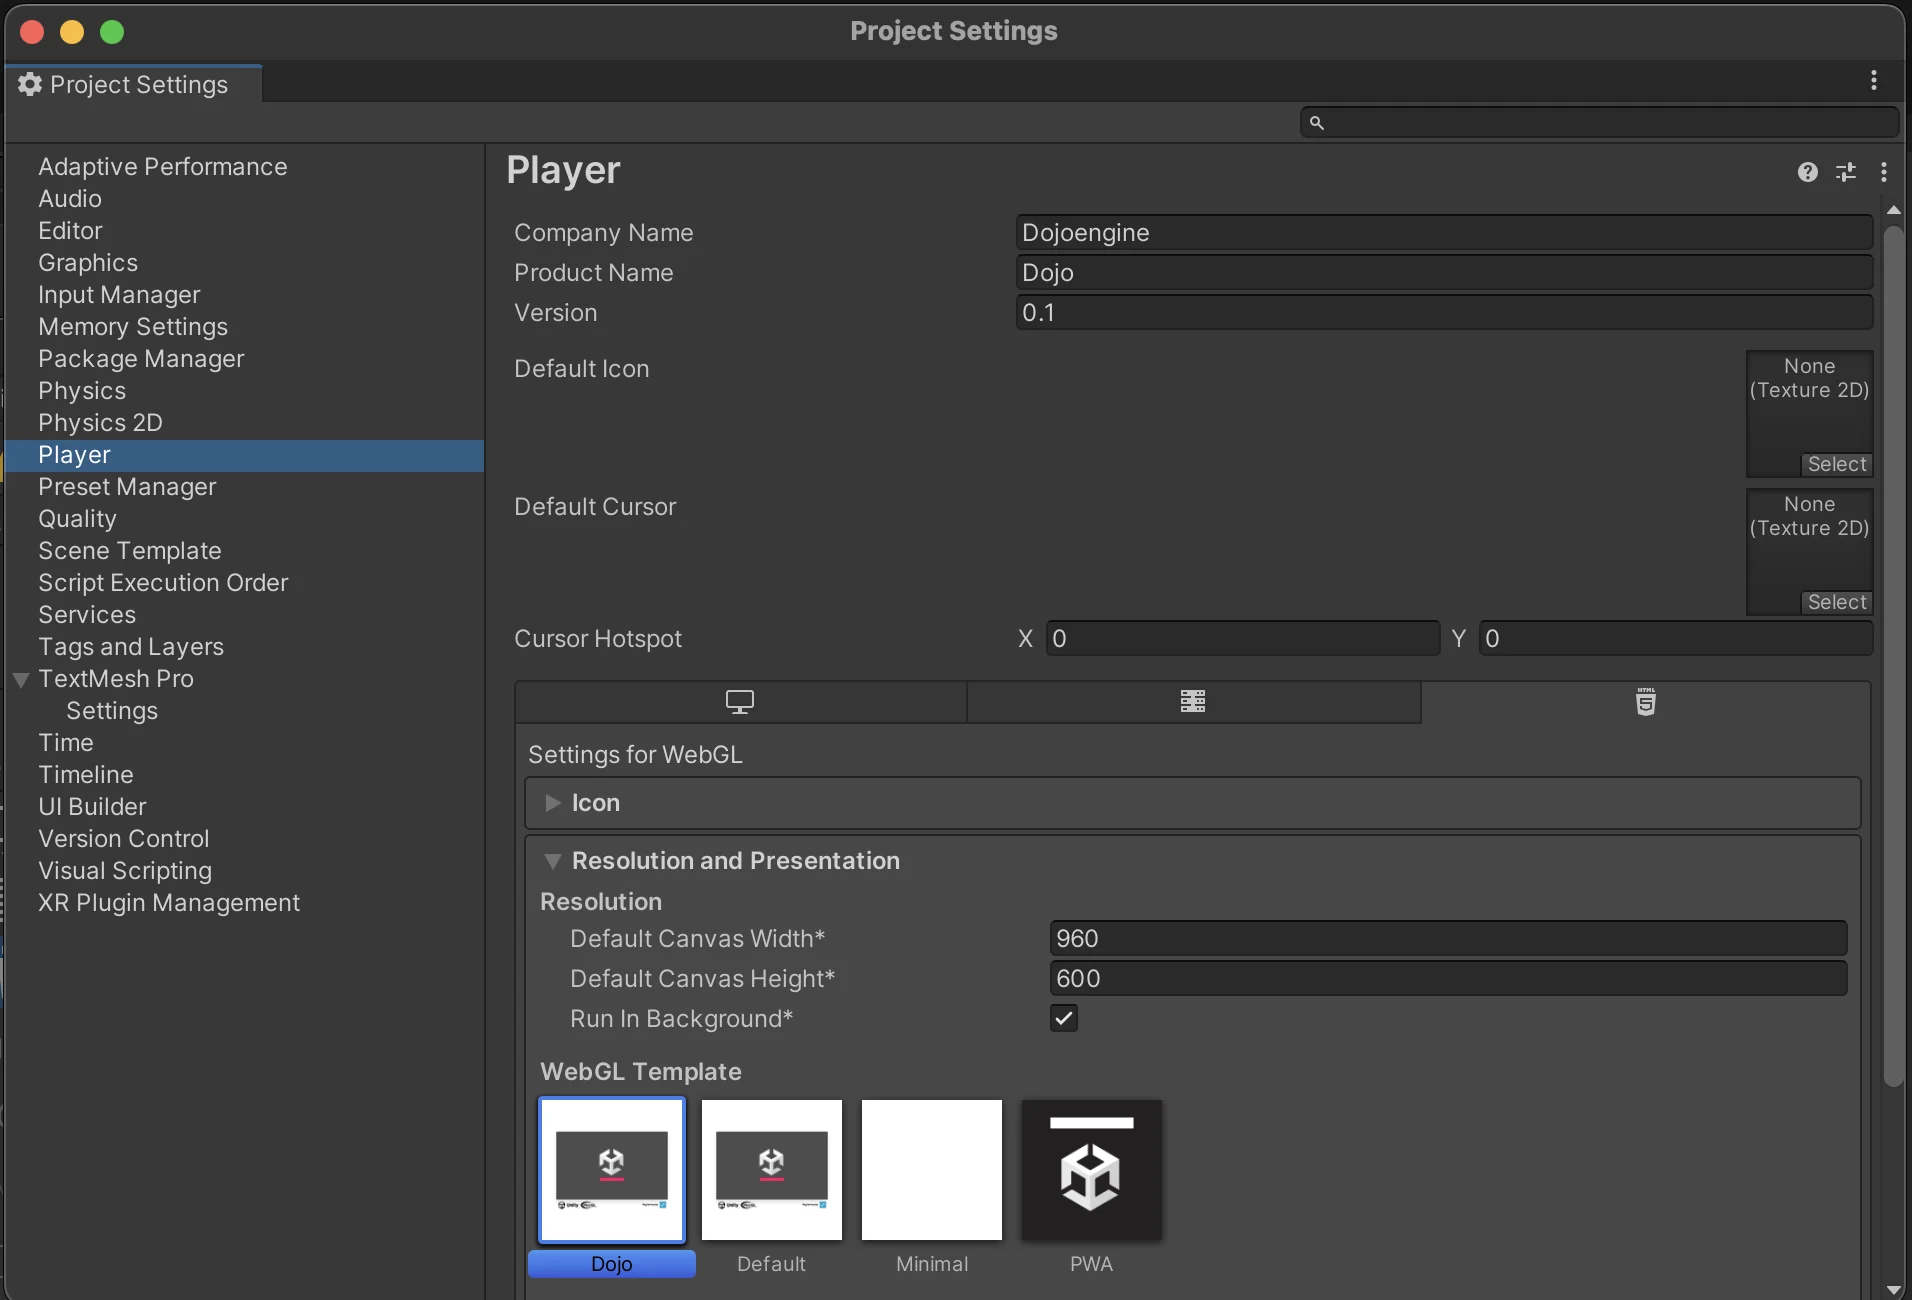
Configure the WebGL player settings
- Go to
Edit/Project Settings/Player(or navigate directly using the Project Settings window). - Select the
WebGLtab. - Under
Resolution and Presentation, ensure theDojo Templateis selected.
Build your project
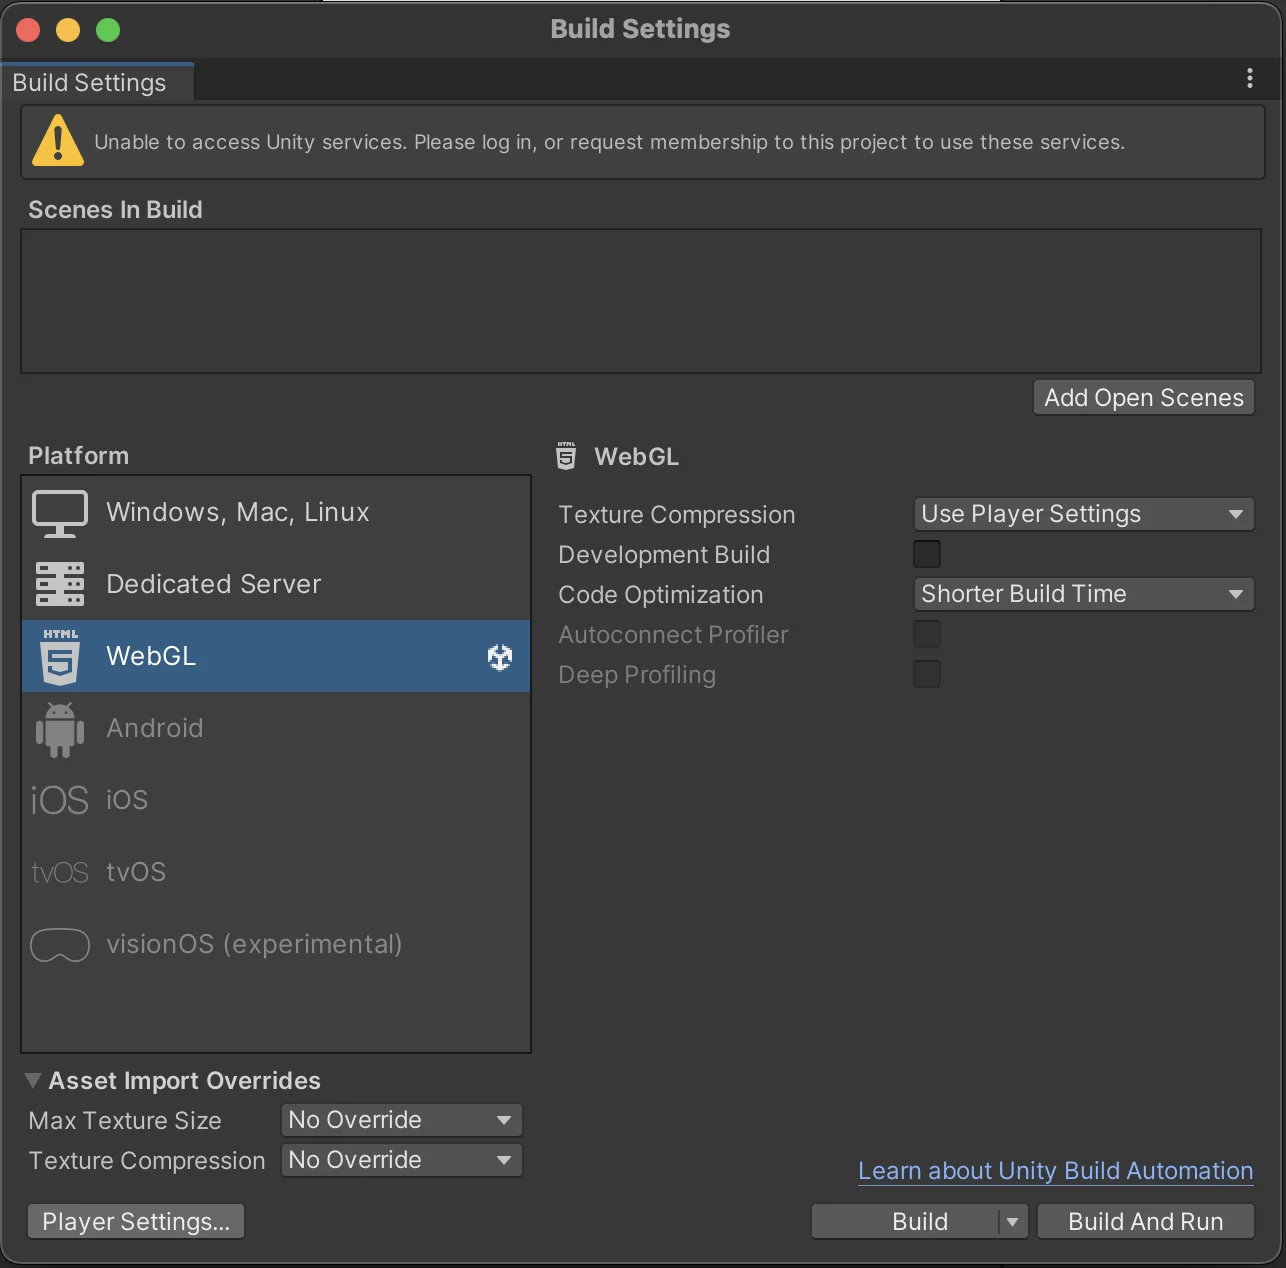
- Navigate to
File/Build Settings. - From the right menu choose
WebGLoption. - Click the Build button to build your game for WebGL.
Troubleshooting
Build Issues
Model Binding Errors
When modifying the bindings generated during bindgen, ensure that all fields in the model bindings are declared as public.
WebGL Build Errors
You may encounter the following error while building for WebGL:
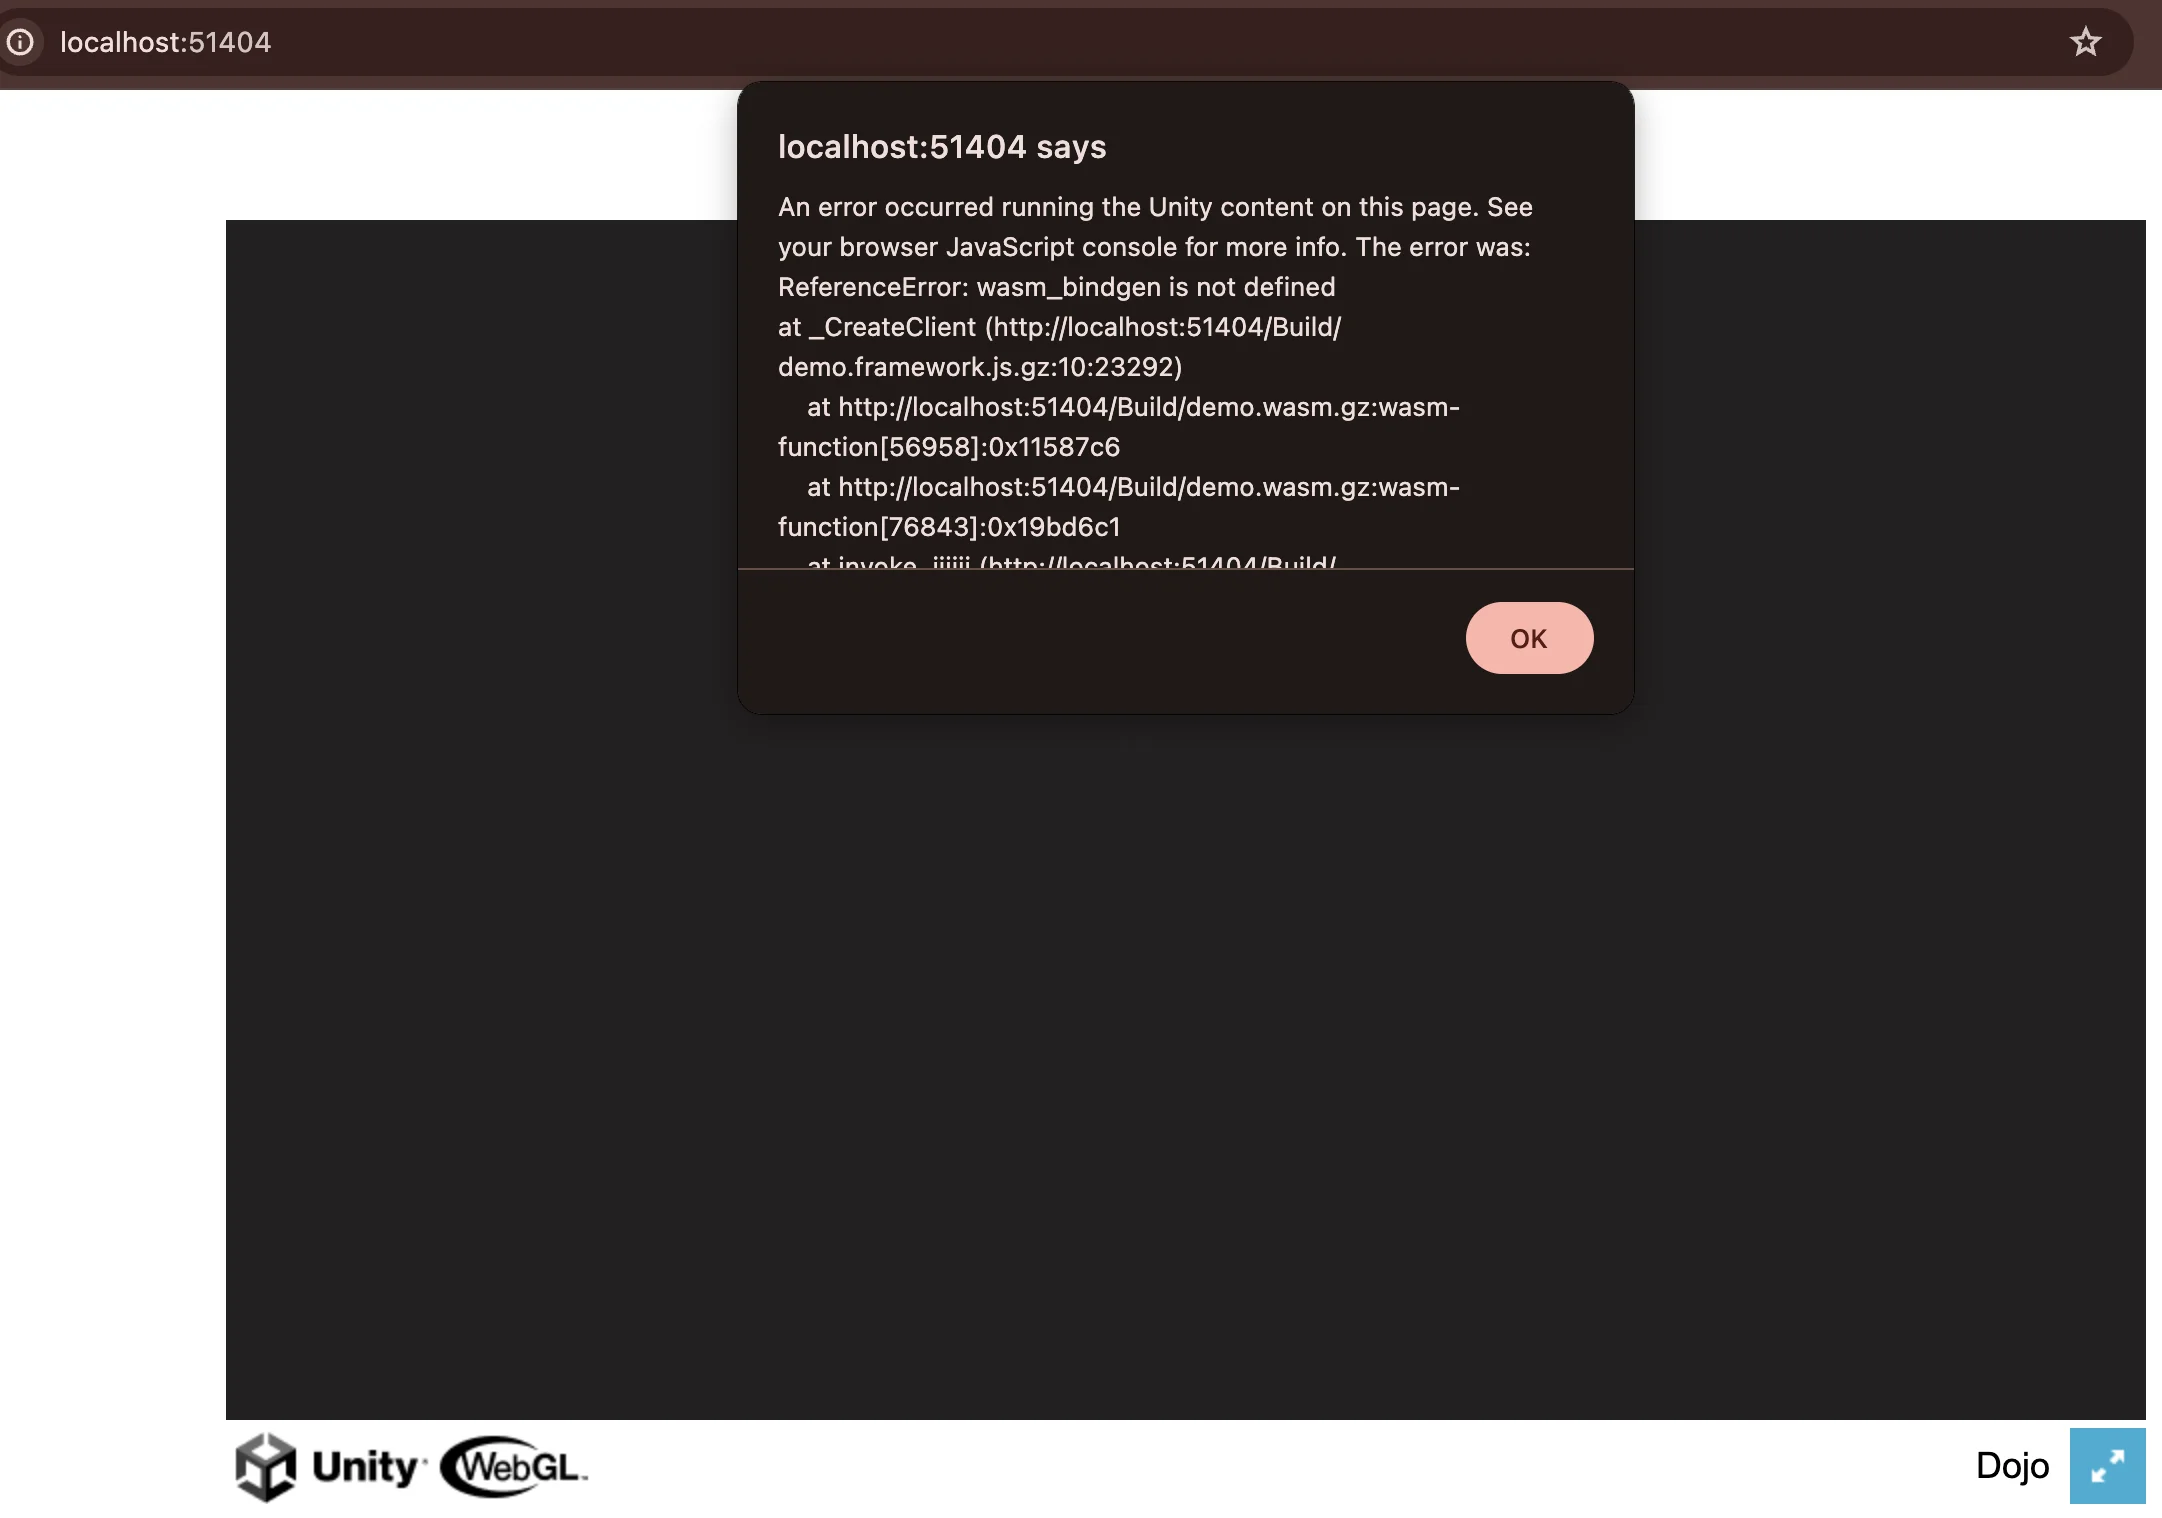
Here are the steps to address it:
-
Verify Dojo Template Selection:
- Navigate to
Edit > Project Settings > Player(or directly through the Project Settings window).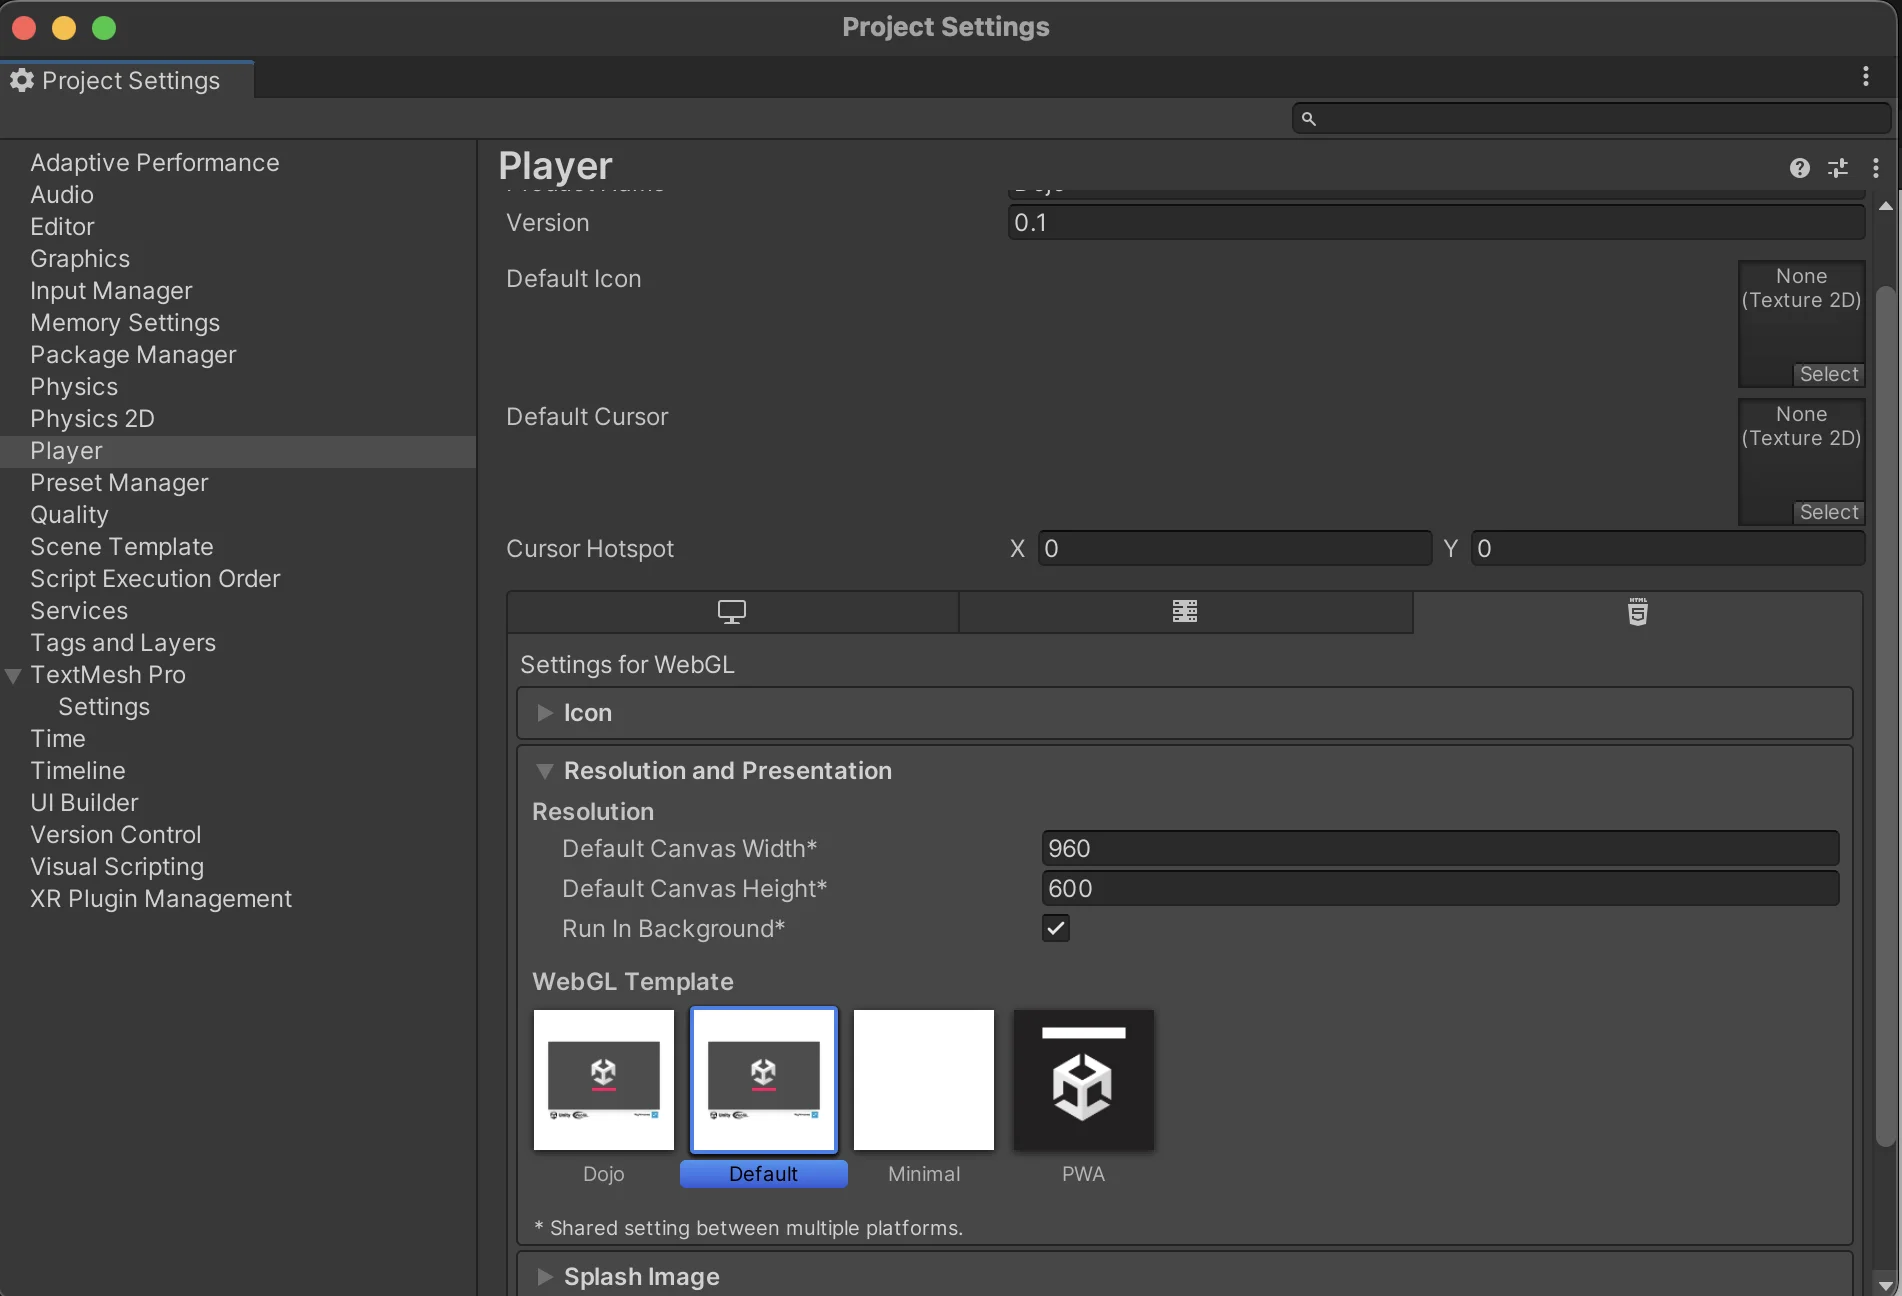
Example without
Dojotemplate selected - Select the WebGL tab.
- Under
Resolution and Presentation, ensure theDojoTemplate is selected. - If the Dojo template is missing, proceed to
step 2.
- Navigate to
-
Download WebGL Templates Folder: If the Dojo template is unavailable in Player Settings, it's likely missing from your project.
- Navigate to the Dojo Unity repository
- Download the
WebGL templatesfolder. - Add this folder to your project's Assets directory.
-
Rebuild Your Project: After ensuring the Dojo template is selected or added, try rebuilding your project for WebGL.
Slot on Desktop
Currently, Slot functionality is not available on desktop platforms due to a server error preventing the initialization of the ToriiClient within the WorldManager component. Attempting to use Slot with a desktop build will result in the following exception:
Exception: status: Unknown, message: "h2 protocol error: http2 error: connection error detected: frame with invalid size", details: [], metadata: MetadataMap { headers: {} }
Dojo.Torii.ToriiClient..ctor (System.String toriiUrl, System.String rpcUrl, System.String world, dojo_bindings.dojo+KeysClause[] entities) (at Assets/Dojo/Runtime/Torii/ToriiClient.cs:40)
Dojo.WorldManager.Start () (at Assets/Dojo/Runtime/WorldManager.cs:28)Runtime Issues
Async Calls Failing
If asynchronous (await) calls to your Dojo systems are not working, ensure that the UnityMainThreadDispatcher is present in your scene.
This prefab should have been added during the scene setup process.
Authentication Errors
While executing a transaction from your Unity project, you may encounter the following error in the Katana logs:
2024-03-19T18:05:46.841197Z WARN executor: Transaction execution error: "Error in the called contract (0x00280a3deba2004bbbdb3d60a619f3059305f2399ab1e1cd630ec20249abe5fa):
Error at pc=0:4573:
Got an exception while executing a hint.
Cairo traceback (most recent call last):
Unknown location (pc=0:67)
Unknown location (pc=0:1835)
Unknown location (pc=0:2478)
Unknown location (pc=0:3255)
Unknown location (pc=0:3795)
Error in the called contract (0x05024efa0bbd4ec33a2f56251a5d67d8ed2b1e88cbdba566cbce6d3d757db21f):
Error at pc=0:1867:
Got an exception while executing a hint: Hint Error: Execution failed. Failure reason: 0x6e6f7420777269746572 ('not writer').
Cairo traceback (most recent call last):
Unknown location (pc=0:256)
Unknown location (pc=0:634)
Error in the called contract (0x01bf3dfc0c2b66b3d4abb47e9c8e4c5552992dbc70bb2566b9f6d6ee9b707317):
Execution failed. Failure reason: 0x6e6f7420777269746572 ('not writer').The solution is to navigate to the src directory within your Dojo project and run the default_auth.sh script in your shell.

Example Project
This section provides a walkthrough for running the example from the dojo.unity repository using the Dojo Starter repository.
Prerequisites
Clone the dojo.unity and Dojo Starter repositories.
Setting up Dojo Starter
Follow the steps outlined in the Dojo Starter setup guide to deploy your Dojo project locally: 1) launch Katana, 2) build with Sozo, and 3) launch Torii.
Setting up dojo.unity
- Open the scene: In the
Project tab, navigate toAssets/Spawn And Move/Scenes/Sample scene - Adjusting Scriptable Objects:
- Verify that the
player addressandplayer privatekey inAssets/Spawn And Move/Dojo5.0Datamatch the output of the Katana terminal. - Verify that the
world addressin the Scriptable Object located atAssets/Dojo/Runtime/Config/WorldManagerLocalConfigmatches the output of the Sozo migrate command.
- Verify that the
Running the Example
- Play the opened scene.
- To spawn an entity, press the
space key. - To move the entity, use the keys:
a (left),w (forward),s (backward),d (right).
::::