
Your First Dojo App
In this tutorial, you'll create your first Dojo project from scratch and deploy it locally. By the end, you'll have a working game where you can spawn and move a character using a browser-based client.
What You'll Learn
- The structure of a Dojo project
- Basic Entity Component System (ECS) concepts
- How to start the development environment
- Deploying your first World
- Interacting with your deployed game
Step 1: Create Your Project
First, clone the Dojo Intro project, which implements a simple spawn-and-move game:
git clone https://github.com/dojoengine/dojo-intro && cd dojo-introNow open up the repo in your code editor and explore the project:
dojo-intro/
├── client/
├── contracts/
│ ├── src/
│ │ ├── systems/ # Game logic (Systems)
│ │ │ └── actions.cairo
│ │ ├── lib.cairo # Main Cairo entry point
│ │ └── models.cairo # Data models (Components)
│ ├── dojo_dev.toml # Dojo configuration
│ ├── katana.toml # Katana configuration
│ ├── Scarb.toml # Cairo configuration
│ └── torii_dev.toml # Torii configuration
└── README.md # Project readmeNote: Some files and directories are omitted for simplicity
Step 2: Understand the Contract Structure
Let's examine the key contracts/ files to understand what we're building:
Models (Entities & Components)
Look at contracts/src/models.cairo to see the data structures:
#[derive(Copy, Drop, Serde)]
#[dojo::model]
pub struct Position {
#[key]
pub player: ContractAddress,
pub x: u32,
pub y: u32,
}
#[derive(Copy, Drop, Serde)]
#[dojo::model]
pub struct Moves {
#[key]
pub player: ContractAddress,
pub remaining: u8,
}These models define:
- Position: Where each player is located (x, y coordinates)
- Moves: How many moves each player has remaining
The #[dojo::model] attribute tells Cairo that the struct is a Dojo model.
The #[key] attribute tells Cairo that player is the Dojo entity identifier for these components.
Contracts (Systems)
Open contracts/src/systems/actions.cairo to see the game logic:
#[starknet::interface]
pub trait IActions<T> {
fn spawn(ref self: T);
fn move(ref self: T, direction: Direction);
fn move_random(ref self: T);
}
#[dojo::contract]
pub mod actions {
// Implementation details...
fn spawn(ref self: ContractState) {
// Create a new player with starting position and moves
}
fn move(ref self: ContractState, direction: Direction) {
// Move the player and decrease remaining moves
}
fn move_random(ref self: ContractState) {
// Move the player randomly and decrease remaining moves
}
}These functions define the game's core actions:
- spawn: Create a new player at the starting position
- move: Move a player in a direction (up, down, left, right)
- move_random: Use the Cartridge vRNG to move in a random direction
Project Configuration
Open contracts/dojo_dev.toml to see the project's Dojo configuration:
[world]
name = "Dojo intro"
... additional project details
[namespace]
default = "di"
[env]
rpc_url = "http://localhost:5050/"
... additional environment details
[writers]
"di" = ["di-actions"]This configuration tells Dojo how to organize permissions when deploying the world.
Specifically, it defines di as the default namespace and permits the systems defined in actions.cairo to write game state.
For more details about configuration options, see the configuration guide.
Step 3: Start the Development Environment
Now let's get the development tools running. You'll run three tools simultaneously, each in its own terminal:
| Tool | Purpose | Terminal |
|---|---|---|
| Katana | Local blockchain sequencer | Terminal 1 |
| Sozo | Build and deploy your contracts | Terminal 2 |
| Torii | Index and serve game data | Terminal 3 |
Terminal 1: Start Katana (Local Blockchain)
First, start Katana, Dojo's high-performance sequencer:
cd contracts && katana --config katana.tomlThis creates a fast, local Starknet environment for development
You'll see output like this:
2025-07-10T15:46:43.495560Z INFO katana_core::backend: Genesis initialized
██╗ ██╗ █████╗ ████████╗ █████╗ ███╗ ██╗ █████╗
██║ ██╔╝██╔══██╗╚══██╔══╝██╔══██╗████╗ ██║██╔══██╗
█████╔╝ ███████║ ██║ ███████║██╔██╗ ██║███████║
██╔═██╗ ██╔══██║ ██║ ██╔══██║██║╚██╗██║██╔══██║
██║ ██╗██║ ██║ ██║ ██║ ██║██║ ╚████║██║ ██║
╚═╝ ╚═╝╚═╝ ╚═╝ ╚═╝ ╚═╝ ╚═╝╚═╝ ╚═══╝╚═╝ ╚═╝
PREDEPLOYED CONTRACTS
==================
| Contract | ETH Fee Token
| Address | 0x49d36570d4e46f48e99674bd3fcc84644ddd6b96f7c741b1562b82f9e004dc7
| Class Hash | 0x00a2475bc66197c751d854ea8c39c6ad9781eb284103bcd856b58e6b500078ac
...
PREFUNDED ACCOUNTS
==================
| Account address | 0x127fd5f1fe78a71f8bcd1fec63e3fe2f0486b6ecd5c86a0466c3a21fa5cfcec
| Private key | 0xc5b2fcab997346f3ea1c00b002ecf6f382c5f9c9659a3894eb783c5320f912
| Public key | 0x33246ce85ebdc292e6a5c5b4dd51fab2757be34b8ffda847ca6925edf31cb67
...
ACCOUNTS SEED
=============
0
2025-07-10T15:46:43.496299Z INFO katana_node: Starting node. chain=0x4b4154414e41
2025-07-10T15:46:43.496406Z INFO rpc: RPC server started. addr=127.0.0.1:5050Keep this running - it's your local sequencer environment.
Terminal 2: Deploy Your World
In a new terminal, run the following command using Sozo, Dojo's build tool.
cd contracts && sozo build && sozo migrateThis compiles your Cairo contracts and deploys them to the local sequencer
Expected output:# sozo build
Compiling dojo_intro v1.5.0 (~/dojo-intro/contracts/Scarb.toml)
Finished `dev` profile target(s) in 8 seconds
# sozo migrate
profile | chain_id | rpc_url
---------+----------+------------------------
dev | KATANA | http://localhost:5050/
🌍 World deployed at block 2 with txn hash: 0x06a03fcc52739807ff4e7cd96fceb40b8fc194f3d7b370c1c8388eb380a4a069
⛩️ Deploying 0 external contracts...
⛩️ Migration successful with world at address 0x04d9778a74d2c9e6e7e4a24cbe913998a80de217c66ee173a604d06dea5469c3Terminal 3: Start Torii (Indexer)
In a third terminal you'll start Torii, Dojo's indexer:
cd contracts && torii --config torii_dev.tomlThis watches your blockchain and creates queryable APIs for your game data
Torii will start indexing your world's data. You'll see:
2025-07-10T15:59:27.961623Z INFO torii::relay::server: Relay peer id. peer_id=12D3KooWLaZ5bummiPSM2HHtRahELYUFWQA12NWNeMQ4aYpVhk9h
2025-07-10T15:59:27.966166Z INFO torii:runner: Starting torii endpoint. endpoint=127.0.0.1:8080
2025-07-10T15:59:27.966177Z INFO torii:runner: Serving Graphql playground. endpoint=127.0.0.1:8080/graphql
2025-07-10T15:59:27.966202Z INFO torii:runner: Serving SQL playground. endpoint=127.0.0.1:8080/sql
2025-07-10T15:59:27.966207Z INFO torii:runner: Serving MCP endpoint. endpoint=127.0.0.1:8080/mcp
2025-07-10T15:59:27.966210Z INFO torii:runner: Serving World Explorer. url=https://worlds.dev/torii?url=127.0.0.1%3A8080%2Fgraphql
2025-07-10T15:59:27.966212Z INFO torii:runner: Serving ERC artifacts at path path=/var/folders/dh/khjwlwbd6tx9p785khl57xjr0000gn/T/.tmpqeRBF0
2025-07-10T15:59:27.967054Z INFO torii::relay::server: Serving libp2p Relay. address=/ip4/127.0.0.1/tcp/9090
2025-07-10T15:59:27.967228Z INFO torii::relay::server: Serving libp2p Relay. address=/ip4/127.0.0.1/udp/9090/quic-v1
2025-07-10T15:59:27.967369Z INFO torii::relay::server: Serving libp2p Relay. address=/ip4/127.0.0.1/udp/9091/webrtc-direct/certhash/uEiB-v7fMcMjwd5WT_kgzPYOETr_IcyJ91zKbpG3AilHV_w
2025-07-10T15:59:27.967637Z INFO torii::relay::server: Serving libp2p Relay. address=/ip4/127.0.0.1/tcp/9092/ws
2025-07-10T15:59:27.974035Z INFO torii::indexer::processors::register_model: Registered model. namespace=di name=Moves
2025-07-10T15:59:27.974166Z INFO torii::indexer::processors::register_model: Registered model. namespace=di name=PositionReading this output, you'll see that Torii has set up some local endpoints, which the client will use to fetch game state.
You'll also see that Torii has registered the game models Moves and Position we saw earlier, within the di namespace.
Congratulations! Your Dojo development environment is up-and-running.
Step 4: Launch Your Game Client
Now let's test your game! First, let's launch your game client:
cd client && pnpm install && pnpm run devYou should see:
# pnpm install
# Installation details ...
Done in 409ms using pnpm v10.6.4
# pnpm run dev
> client@1.0.0 dev /Users/kronosapiens/code/cartridge/dojo-intro/client
> vite dev
VITE v6.3.4 ready in 152 ms
➜ Local: https://localhost:5173/
➜ Network: use --host to expose
➜ press h + enter to show helpNow navigate to https://localhost:5173/ to reach the running client.
You should see a page which looks like this:

Click Connect to launch the Cartridge Controller log-in flow.
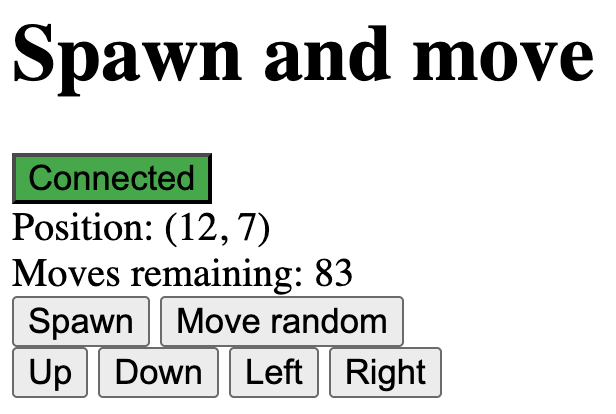
Once you have logged in with Controller, you should be able to spawn a character and move them around.
After a while, you should have something which looks like this:
Understanding What Happened
Let's break down what you just accomplished:
- Defined Components:
PositionandMovesstore data about each player - Implemented Systems: The
spawnandmovefunctions modify component data - Created a World: Your World acts as the central registry for all game data, logic, and access control
- Used the Toolchain:
- Katana provided a local sequencer
- Sozo managed compilation and deployment
- Torii indexed data and sent it to the client
Key Concepts
Entity Component System (ECS)
- Entities: Players in your game (identified by their address)
- Components: Data attached to entities (
Position,Moves) - Systems: Functions that operate on components (
spawn,move)
Dojo World
Your World coordinates everything:
- Registers all models and systems
- Handles permissions and authorization
- Provides a consistent interface for data access
Event-Driven Updates
When you execute a system, it emits events that Torii captures and indexes, which clients can subscribe to.
Next Steps
Congratulations! You've successfully:
- ✅ Understood basic ECS concepts
- ✅ Created and deployed your first Dojo project
- ✅ Used the core development tools
- ✅ Interacted with your deployed world
Ready to dive deeper? Continue to Understanding the Toolchain to learn more about the tools that make Dojo development possible. When you're ready to explore the broader Dojo ecosystem, see Next Steps for advanced topics and deployment strategies.